آموزش کار با MultiPHP INI Editor در cpanel
دوستان عزیز پیشگام وبی امیدوارم که حالتون خوب باشه ، امروز با آموزش کار با MultiPHP INI Editor در cpanel خدمتتون هستیم و امیدوارم توضیحاتی که در این مطلب و یا در انتها مطلب که بصورت فیلم قرارداده شده بتونه به شما کمک کنه و هر روز بیشتر پیشرفت کنید.
خوب اصلا این قسمت به چه دردی میخوره کجا بهش نیاز داریم و در کل کاربردش چی هست؟
این قسمت برای تغییر پسورد در سی پنل میباشد که با عنوان MultiPHP INI Editor در قسمت Software موجود میباشد.
ابتدا وارد هاستمون داخل سایت پیشگام وب میشیم.
میتوانیم از سرویس های من ورود به سی پنل رو میزنید تا بصورت اتوماتیک وارد هاستمون بشیم.
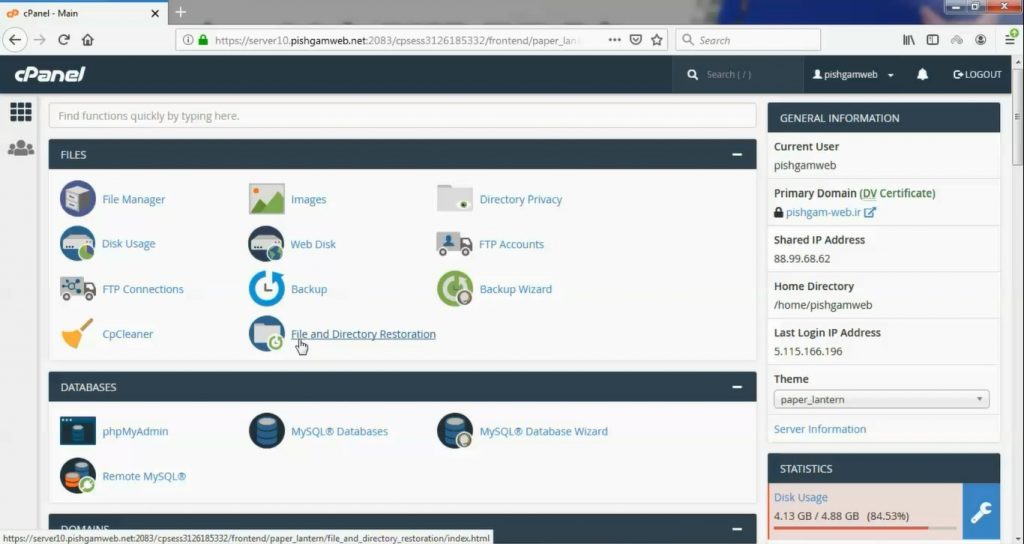
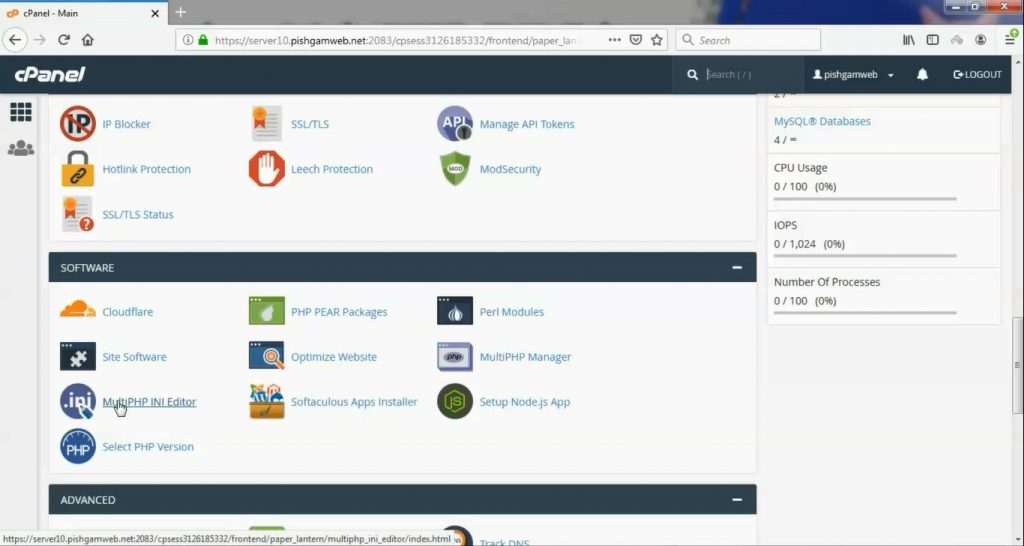
این مورد دقیقا مشابه سلکت پی اچ پی ورژن در همین بخش میباشد ، البته با این تفاوت که دقت تنظیمات بیشتر میباشد و میتوانیم کدهای اختصاصی خود را هم اجرا کنیم.
بعد از ورود به قسمت MultiPHP INI Editor در سی پنل با صفحه زیر روبرو میشود.
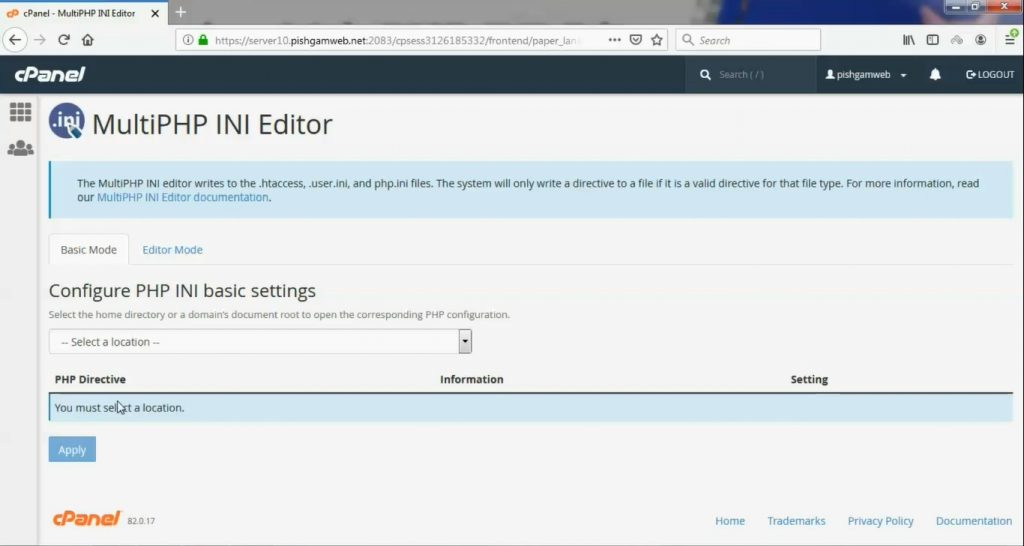
ابتدا قسمت Basic Mode توضیح داده میشود.
در قسمتSelect the home directory or a domain’s document root to open the corresponding PHP configuration. دامنه مورد نظر خود را انتخاب میکنیم.
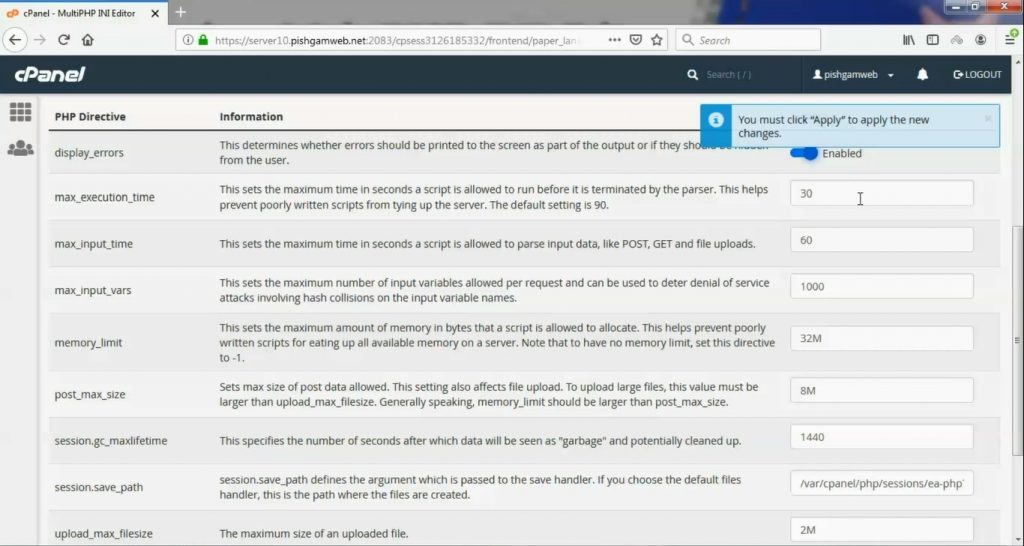
موارد مهم در این قسمت توضیح داده میشود.
سپس تنظیمات برای شما باز میشود در قسمت display_errors روی دکمه کلیک کنید حالت Enabled گردد.
در سه مورد اول تایم اوت را میتوانید افزایش دهید ، اگر مشکلی ندارید پیشنهاد میشود این قسمت حالت دیفالت باقی بماند. max_execution_time – max_input_time – max_input_vars
در قسمت memory_limit میتوانید مموری هاست خود را به مقدار دلخواه افزایش دهید.
در قسمت post_max_size ماکزیمم حجم پست های وب سایت خود را مشخص میکنید.
در قسمت upload_max_filesize ماکزیمم حجم فایل های آپلودی از قبیل قالب ها ، افزونه ها و رسانه ها را مشخص میکنید.
در انتها حتما باید گزینه apply را بزنید تا تنظیمات ذخیره گردد.
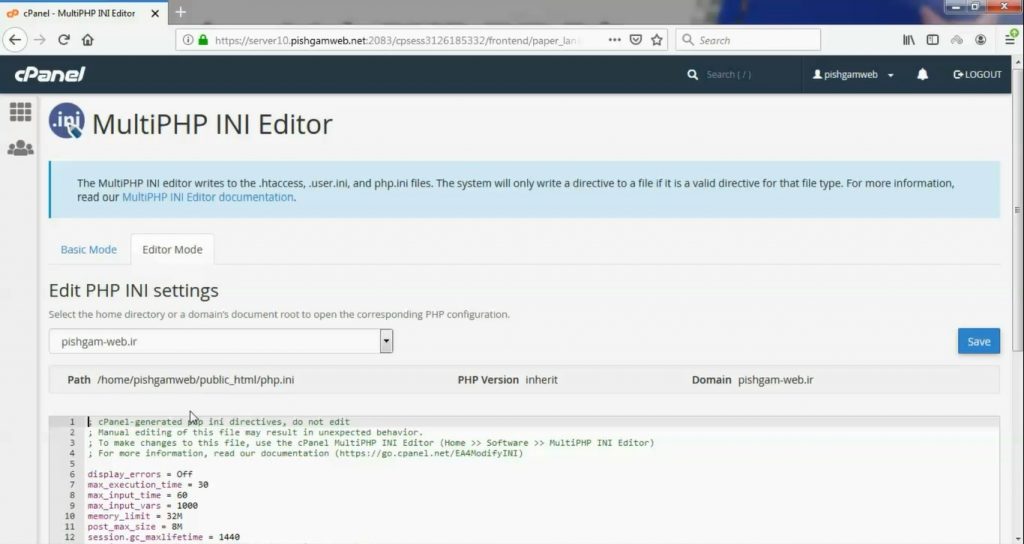
سپس به قسمت Editor Mode میریم.
بعد از انتخاب دامنه مطابق قسمت Basic Mode کد ها در کادر پایین مشخص شده و شما هم میتوانید کد مورد نظر خود را اضافه کنید.
در انتها حتما باید گزینه save را بزنید تا تنظیمات ذخیره گردد.
مشاهده سایت از سایت آپارات
برای دانلود فیلم آموزش از قسمت تنظیمات روی گزینه دانلود کلیک کرده و کیفیت مد نظر خود را انتخاب کنید تا فیلم آموزش دانلود گردد.
نکته : هر چقدر که عدد این قسمت بیشتر باشد ، کیفیت فیلم دانلودی بالاتر خواهد بود.
آموزش های ابتدایی :
دوستان عزیز آموزش که خدمتتون ارائه کردیم از سری آموزش های ابتدایی پیشگام وب هست و این آموزش جزو پایه ای ترین آموزش های سایت هست امیدوارم که آموزشممون کامل باشه.
منتظر نظرات و پیشنهادات شما در قسمت دیدگاه های سایت هستیم.
learn in cpanel
Overview
This interface allows you to configure your PHP settings.
WHM users can view information about the server’s PHP INI settings in WHM’s MultiPHP INI Editor interface (WHM >> Home >> Software >> MultiPHP INI Editor).
MultiPHP INI Editor
Select the location that you wish to configure from the menu. You can edit either the account’s home directory or the domain’s document root. The PHP directives will appear.
Basic Mode
The Basic Mode section of this interface loads directive values from the php.ini file for your selected domain or home directory. Make your changes to the desired directives and click Apply. The system saves changes to the php.ini file, the user.ini file, and your .htaccess file.
If you use the DSO PHP handler and you change your PHP version to a different major PHP version, the system will not read your configuration changes. cPanel & WHM does not support the DSO PHP handler with PHP 8.
For example, if you change your PHP version from PHP 5 to PHP 7, the system will not read your configuration changes. To correct this issue, you must edit and save your PHP configuration again in the interface. The system will then load the .htaccess directives correctly.
- For security purposes, we strongly recommend that you use the cPanel-provided default values.
- The availability of directives depends on your version of PHP. If a directive does not appear in your interface, your version of PHP does not support it.
- The system only writes a directive to an
.inior.htaccessfile if that file supports the directive. Yourphp.ini,.user.ini, and.htaccessfiles may not be identical. For more information about which files support which directives, read PHP’s documentation. - To ensure compatibility with the LSAPI module, the system also adds an LSAPI section to your
.htaccessfile. This section might resemble the following example:1 2 3 4 5<IfModule lsapi_module> php_value date.timezone "America/Chicago" php_value memory_limit 128M php_value upload_max_filesize 60M </IfModule>
Editor Mode
Select the location that you wish to configure from the menu. You can edit either the user account’s home directory or the domain’s document root. The PHP directives will appear.
- You must exercise extreme caution when you make changes in this interface. Errors could result in non-functional PHP scripts. Only advanced users should use this interface.
- We restrict the following words and you cannot use them as directives:
null,yes,no,true,false,on,off, andnone. Directives also cannot contain any the following special characters:?{}|&~


